Setting up ExpressVPN on Linux in New Zealand is straightforward through its native command-line (CLI) application. Users can download and install ExpressVPN, engaging with its servers using simple commands, facilitating a hassle-free setup on the Linux system.
After installation, the ExpressVPN app bolsters your system’s security and offers versatile configuration methods. Although the app can be set up through Ubuntu’s Network Manager or the Linux Terminal, utilizing the native command-line application is highly recommended to maximize privacy and security.
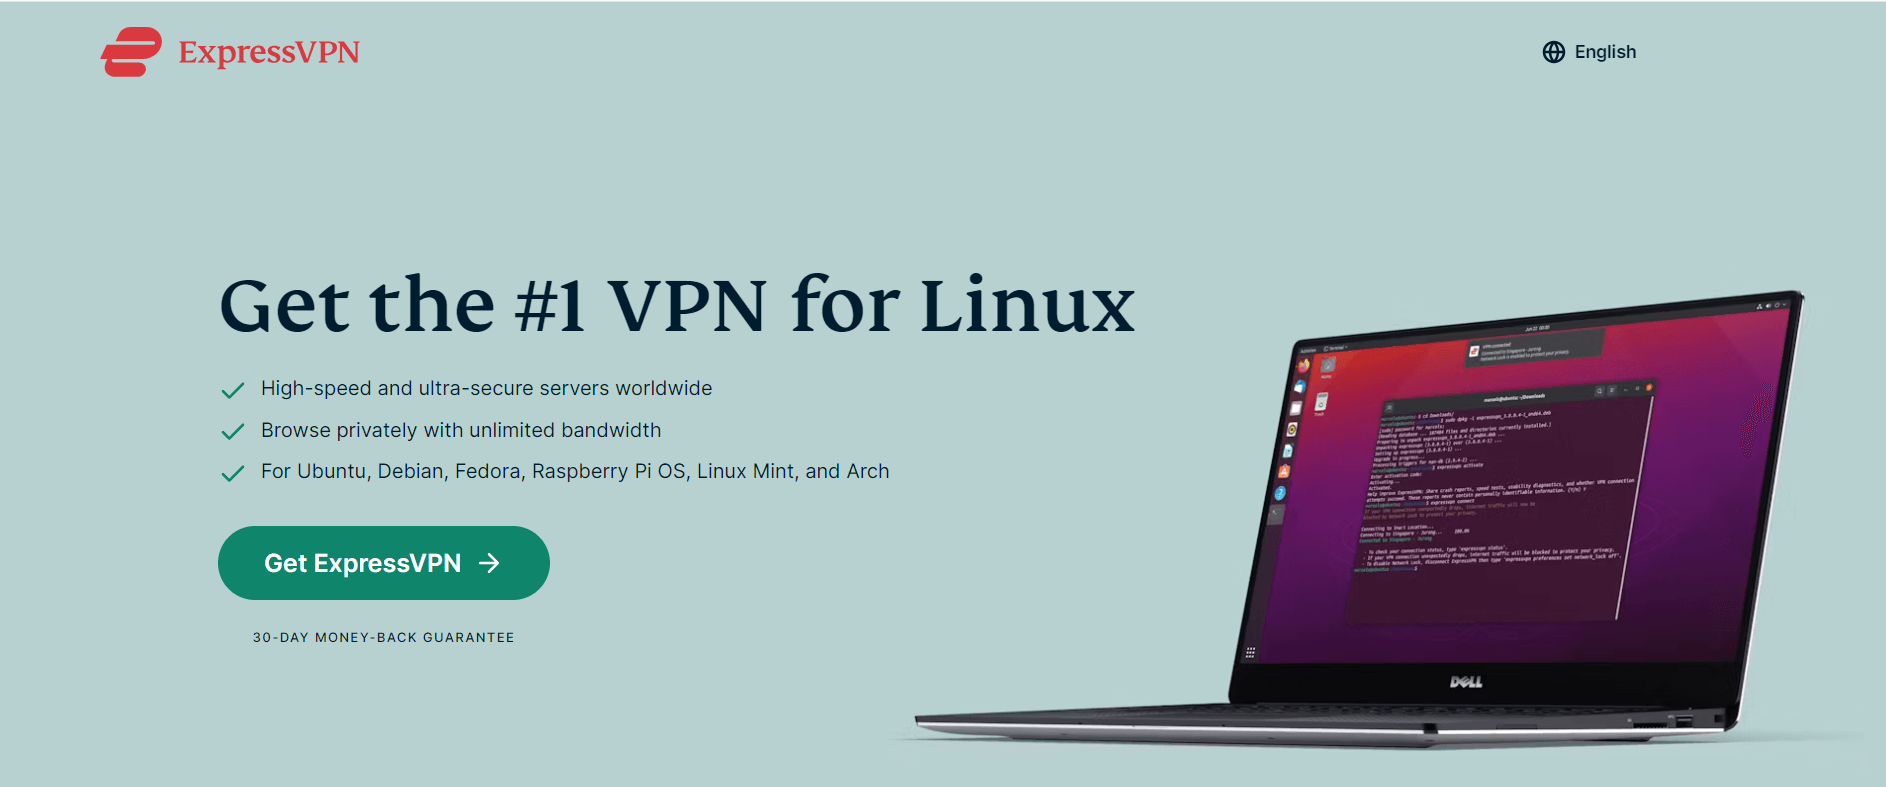
Unlike many VPNs, ExpressVPN is particularly considered one of the best VPNs in New Zealand in terms of providing security and other features. It offers robust security features and consistently fast speeds. Additionally, its compatibility with major Linux distributions such as Ubuntu, Debian, Fedora, Arch, Raspberry Pi, and Linux Mint makes it a versatile choice for Linux users.
While ExpressVPN operates effectively across various Linux distributions such as Maui, Mint, Kali, and Lubuntu, it does not offer individualized support for each. However, the application maintains consistent performance and security across all supported platforms, affirming its reliability for Linux users seeking a dependable VPN solution.
Setting up ExpressVPN on Linux in New Zealand in 2024
Setting up ExpressVPN on your Linux system in New Zealand is straightforward and quick. Follow the steps outlined below to get ExpressVPN up and running on your Linux distribution quickly.
First, subscribe to ExpressVPN by selecting a plan that fits your needs. With a 30-day money-back guarantee, you can try it out risk-free. To download the installer, visit the ExpressVPN Linux page in New Zealand and choose the appropriate installer for your distribution:
- Ubuntu (32-bit and 64-bit)
- Fedora (32-bit and 64-bit)
- Arch (latest rolling release 64-bit)
- Raspberry Pi OS
Note: Debian and Mint users should Install ExpressVPN Ubuntu downloader, while CentOS users should opt for the Fedora installer. You can check your system’s architecture by typing “-m” or “arch” in the terminal. Most modern systems are 64-bit.
Note: Go to the Terminal and enter the following command to see which Ubuntu or Fedora OS you use.
"uname –m"
OR
"arch"
If you are using a 64-bit Linux distribution, you should download the 64-bit installer.
Click Download, and that’s it. You have successfully downloaded the installer on your Linux device.
Install and Activate the App
The next step is to install and activate the downloaded app.
Install the downloaded file.
Note: If you cannot install the app directly with the GUI, you can install it using the ExpressVPN Linux command line. Enter the command line below to start the installation based on your Linux distribution.
Ubuntu/Mint/Debian:
"sudo dpkg -i [installer filename]"
Fedora/CentOS:
"sudo yum install [installer filename] ORsudo dnf install [installer filename]"
After the installation is complete, go to the Terminal and run this command.
"expressvpn activate"
Now paste the verification code from Step 2
Now, you will see Y and N requesting to share anonymized diagnostic reports. Click Y to accept or N to decline. If you have chosen yes, then you need to run the following command:
"expressvpn preferences set send_diagnostics false"
How to Set Up Linux Using the Terminal in New Zealand
The following steps will show you how to manually set up ExpressVPN on Linux in New Zealand using the OpenVPN protocol with ExpressVPN’s configuration files.
- Go to the ExpressVPN Linux Download page and Sign in after entering your credentials.
- On this page, you’ll see your Activation Code in the blue box. Note down the code as you’ll need it later.
- Scroll down the page until you find the Manual Config option in the left-hand menu. Click on this option.
- Click on OpenVPN in the main section.
- You will see your username, password, and a list of OpenVPN configuration files.
- According to your Linux distribution, enter the commands below:
For Ubuntu
- To install the packages for Ubuntu, enter the following command in the Terminal window.
"$ sudo apt install openvpn openvpn-systemd-resolved"
- To launch OpenVPN, enter the following:
"$ sudo openvpn --config /[path to file]/my_expressvpn_[server location].ovpn --script-security 2 --up /etc/openvpn/update-systemd-resolved --down /etc/openvpn/update-systemd-resolved --dhcp-option 'DOMAIN-ROUTE .' --down-pre"
- Replace [path to file] with the path to where the ExpressVPN configuration file was downloaded and [server location] with the location shown in the file name.
For Debian
- To install the packages for Ubuntu, enter the following command in the Terminal window.
"$ sudo apt install openvpn resolvconf"
- To launch OpenVPN, enter the following:
"$ sudo openvpn --config /[path to file]/my_expressvpn_[server location].ovpn --script-security 2 --up /etc/openvpn/update-resolv-conf --down /etc/openvpn/update-resolv-conf"
- Replace [path to file] with the path to where the ExpressVPN configuration file was downloaded and [server location] with the location shown in the file name.
For Fedora/CentOS
- To install the packages for Ubuntu, enter the following command in the Terminal window:
"$ sudo dnf install openvpn"
- To launch OpenVPN, enter the following command:
"$ sudo openvpn --config /[path to file]/my_expressvpn_[server location].ovpn --script-security 2 --up /etc/openvpn/client.up --down /etc/openvpn/client.down"
- Replace [path to file] with the path to where the ExpressVPN configuration file was downloaded and [server location] with the location shown in the file name.
- It would be best if you kept this terminal window open to keep the VPN connection active. You can minimize the terminal window, don’t close it, or you will terminate the VPN connection.
How to use ExpressVPN on Linux in New Zealand
Now that your ExpressVPN app is up and running, let’s see how to use it to connect to a remote server and start browsing in New Zealand:
- Connecting to a Server: Use
"expressvpn connect"to automatically connect to the best smart location in New Zealand, or specify a location with"expressvpn connect [LOCATION]". - Disconnecting: The command
"expressvpn disconnect"will terminate your VPN connection. - Switching Server Locations: To change server locations, input
"expressvpn connect [LOCATION]"the desired location. - Checking Connection Status: Enter
"expressvpn status"to view the current state of your VPN connection. - Updating ExpressVPN: Keep your VPN up-to-date by using.
"expressvpn upgrade".
These commands efficiently tailor your VPN usage to your needs, ensuring a secure browsing experience on Linux systems.
What is the Alternative to VPN for Linux in New Zealand?
If your primary concern is anonymizing your web browsing, consider using a VPN browser extension. Unlike full VPN services that encrypt all outgoing data from your device, browser extensions focus solely on web traffic.
Browser extensions like those offered by ExpressVPN for Google Chrome and Mozilla Firefox provide a simpler solution. They’re incredibly easy to install and perfect for Linux users primarily using these browsers.
Once you install the ExpressVPN extension for Firefox or Chrome, managing your VPN connection becomes effortless. You can quickly choose a server, connect, or disconnect directly within your browser. It also features a smart location option to connect automatically to the nearest and fastest server, or you can select a server by location.
I suggest enabling the feature that reconnects you to the last used server each time you open your browser. This ensures your browsing starts securely without any unencrypted data leaks.
Why Do You Need a VPN for Linux in New Zealand?
While Linux is robustly secure, it is not impervious to cyber threats. Sensitive information can still be exposed to hackers or compromised on unsecured public WiFi networks. ExpressVPN’s Linux app shields your browsing activities in these environments.
Linux ExpressVPN redirects your internet traffic through a secure server, encrypting your connection and concealing your real IP address. For instance, it can make it seem like you are in the US while you’re actually in the UK. The service maintains a strict no-logs policy, ensuring your data is not recorded or shared with third parties, and includes DNS leak protection to prevent data leaks.
The ExpressVPN client for Linux boasts a vast server network across 105 countries, enabling easy bypass of geoblocks. This allows you to access services like Netflix US, BBC iPlayer, and HBO Max from abroad without buffering, thanks to high-speed connections. It also offers 24/7 live chat support for any assistance needed.
What do Reddit users say about ExpressVPN’s compatibility with Linux in New Zealand?
ExpressVPN is generally praised for its robust service, though it does have a notable limitation on Linux: it lacks support for split tunneling. This feature is readily available on other platforms, leaving Linux users without this convenient option.
Some tech-savvy individuals have found a workaround by running ExpressVPN inside a Docker container. This method can be a bit involved and might require technical knowledge to set up properly.
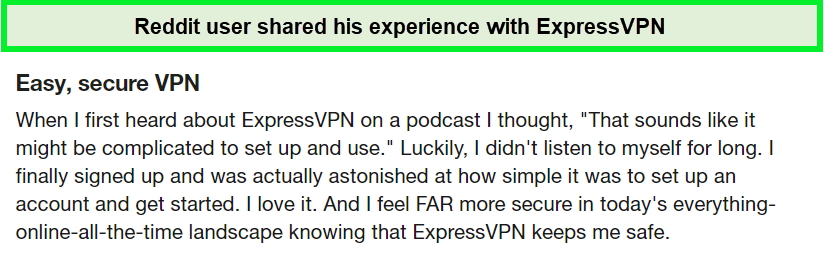
Reddit users shared that ExpressVPN’s compatibility makes its online working safe in New Zealand.
Despite these challenges, my experience with ExpressVPN Kali Linux and its other versions has been very positive. The service operated seamlessly, providing a secure and speedy connection. For those not specifically seeking an easy split tunneling setup, ExpressVPN offers a reliable and efficient solution for Linux users.
More Guides of VPNranks in New Zealand
- ExpressVPN on Android in New Zealand: Seamless Security for Your Android in New Zealand
- ExpressVPN on Windows in New Zealand: Unlock Robust Windows Protection in New Zealand
- Setup VPN on Mac in New Zealand: Elevate Your Mac’s Security in New Zealand
- ExpressVPN on iPhone in New Zealand: Secure Your iPhone Experience in New Zealand
- Change Ubuntu IP address in New Zealand : Get to know how you can change Ubuntu IP address with the help of the VPN.
- Change Mac IP address in New Zealand: Get to know how you can change Mac’s IP address with the help of the VPN.
ExpressVPN on Linux in New Zealand – FAQ
Can I use ExpressVPN on Linux in New Zealand?
Yes, you can use ExpressVPN on Linux. Besides the traditional command-line interface (CLI), you have the option to control the ExpressVPN app via a graphical user interface (GUI). This can be done through the ExpressVPN browser extensions available for Chrome, Firefox, or Edge.
How do I activate ExpressVPN on Linux in New Zealand?
To activate ExpressVPN on Linux, start by retrieving your ExpressVPN account credentials. Visit the ExpressVPN setup page, and when prompted, enter your credentials and click Sign In.
You will need to enter a verification code sent to your email to proceed. Once signed in, install the VPN and connect following the instructions specific to your Linux distribution, like you can create a combo of ExpressVPN Ubuntu.
Why is ExpressVPN not connecting on Linux in New Zealand?
If you encounter connection issues with ExpressVPN on Linux, follow these troubleshooting steps to resolve the problem. First, ensure you have the latest version of the ExpressVPN app for Linux. Try to connect to a different VPN server location. If the issue persists, consider changing your VPN protocol to see if that improves the connection.
Does ExpressVPN Work on All Linux Distros in New Zealand?
ExpressVPN is compatible with most Linux distributions, including Ubuntu, Fedora, Arch, and Raspbian. However, it may not be officially supported on every distro. Users can still install it using the Terminal and ExpressVPN OpenVPN Linux for comprehensive protection.
Can I Use a Free VPN Instead of ExpressVPN on Linux in New Zealand?
While free VPNs are available, they often lack robust security features and can compromise privacy by tracking or selling user data. ExpressVPN offers advanced security features and a risk-free 30-day money-back guarantee for a secure experience.
Is There a Graphical User Interface (GUI) for ExpressVPN on Linux?
ExpressVPN does not offer a GUI for Linux. Users interact with the service using command-line instructions or by installing browser extensions of ExpressVPN Linux for GUI access.
How Does ExpressVPN Enhance My Linux Experience in New Zealand?
ExpressVPN enhances Linux by offering security features like AES-256 encryption, a no-logs policy, and DNS leak protection. It also provides access to geo-restricted content and maintains fast connection speeds.
What Should I Do if ExpressVPN Isn’t Connecting on Linux in New Zealand?
If ExpressVPN isn’t connecting on Linux, try switching servers or VPN protocols. Additionally, ensure you have the latest version of the app and that your subscription is active. If issues persist, ExpressVPN’s customer support can assist.
Conclusion
Linux is renowned for its robust security, but even the most secure systems can benefit from additional protection, especially when connecting to public Wi-Fi. A VPN enhances security by encrypting data and hiding your online identity, making it harder for cyber threats to penetrate.
VPNs operate by routing your traffic through a secure server, encrypting your internet connection, and masking your IP address. This setup secures your data from prying eyes and allows you to access geo-restricted content from anywhere in the world.
ExpressVPN on Linux in New Zealand offers fast server speeds, strong encryption, and a strict no-logs policy. It supports various Linux distributions with user-friendly apps, making it a reliable tool for enhancing online privacy and security. Try ExpressVPN risk-free with a 30-day money-back guarantee to experience its full capabilities.