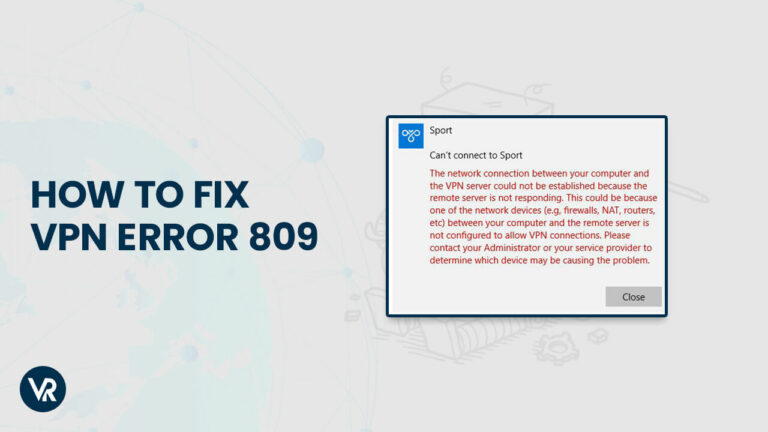
VPN error 809 means the remote server is not responding and hence no connection can be made. It is common for a VPN connection to terminate with VPN error 809 in New Zealand if a firewall is blocking data communication between the user and the VPN server.
Even if you are using the best VPN, it’s not uncommon for issues to arise. The VPN error 809 in New Zealand could appear on your Windows device if you’re using a VPN. One common scenario in which VPN error 809 occurs is when Windows refuses to allow a VPN connection to be set up because of a firewall, or when a Windows VPN connection is attempted to be set up on a NAT device instead of a firewall.
Saving IP addresses is one of the main goals of Network Address Translation (NAT). Connectivity is provided for private IP networks using unaffiliated IP addresses. To convert illegal IP addresses into legitimate ones, NAT is typically implemented on a router that links a number of networks together.
In this article, we have discussed a few vital causes, the role of the best Windows VPN in New Zealand, and solutions to rectify VPN error 809 in New Zealand. Let’s see what solutions we have gathered for you.
Fix the VPN Error 809 in New Zealand on Windows
Here are several solutions for Windows users experiencing VPN error 809 in New Zealand:
1. Enable the Ports on Your Firewall/Router
In most cases, the VPN error 809 windows 11 is brought on by a firewall or router that is restricting access to the PPTP port (TCP 1723) or the IKEv2 port, or the port L2TP. It is possible that you may experience this problem because your VPN utilizes the IKEv2 protocol.
The solution is not as difficult as you might think! To open the ports, you simply need to enable them on your firewall or router.
2. Add Value to the Windows Registry
If your MX is located there behind the NAT and you are attempting to make a VPN connection, you must add the “AssumeUDPEncapsulationContextOnSendRule” DWORD parameter to the Windows registry.
This enables Windows to build an encrypted channel when both the VPN server and the client system are located behind NAT devices. Here’s how:
- Log into Windows with admin privileges.
- Enter “Run” in the search field and then select the application.
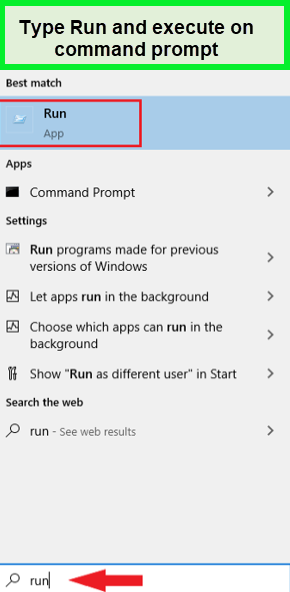
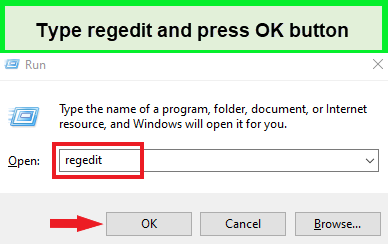
- Enter “regedit” and press ‘OK.’
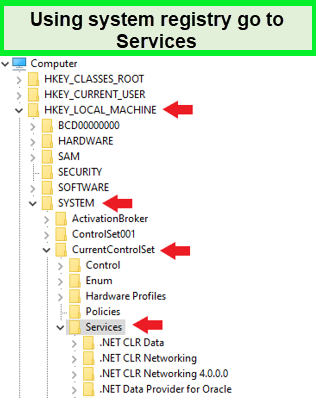
- Now in the open Window, locate the following path: PolicyAgent is located under HKEY LOCAL MACHINE >> SYSTEM >> CurrentControlSet > Services.
- Right-click the route and then create a new ‘DWORD (32-bit) Value‘.
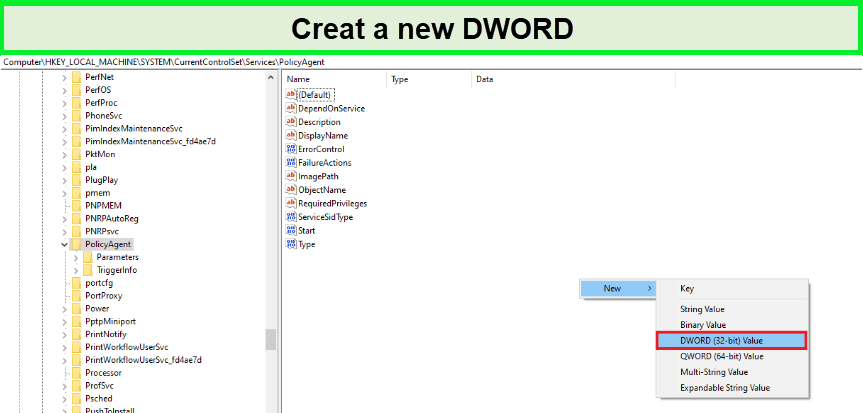
- Replace the current value with “AssumeUDPEncapsulationContextOnSendRule.“
- Change the new entry’s Value Data from “0” to “2” and then click “OK.”
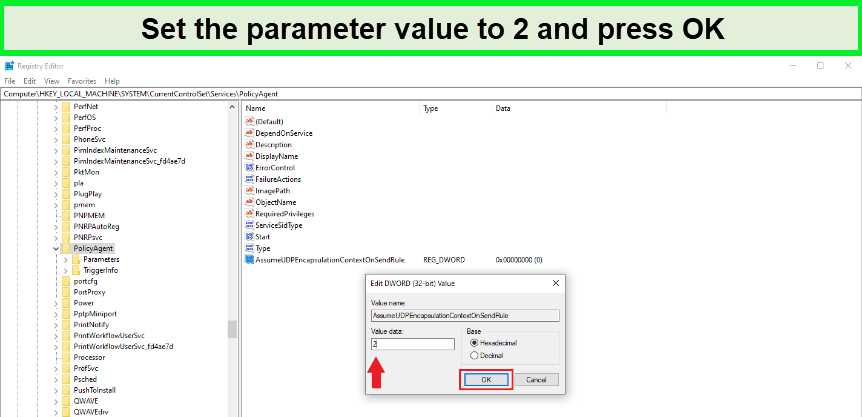
- Restart the device and verify the connection. This is an ideal approach when a client computer is located behind NAT devices.
3. Disable Xbox Live Networking services
A Windows 10 application may prohibit connectivity to the L2TP/IPsec VPN. To remedy this issue and avoid encountering error 809, you can do the following:
- Enter “services” in the search box, then click “Services.“
- Double-click “Xbox Live Networking Services” when you find it.
- In the ‘startup type‘ drop-down option, select “Disabled.“
- Click “Apply” and then click “OK.”
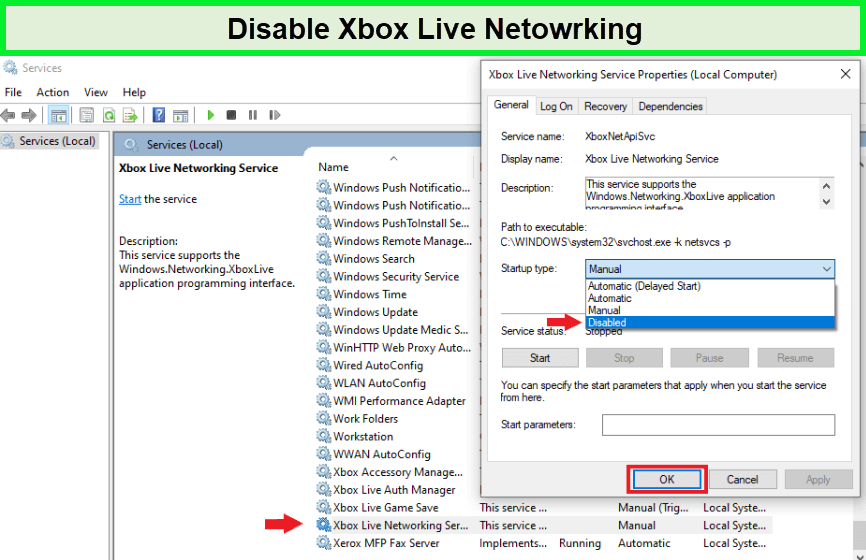
Confirm that your VPN connection is active and working.
4. Enable IKEv2 Fragmentation
IKE fragmentation can cause VPN error 809 windows 10 while utilizing the IKEv2 which is the best VPN protocol other than L2TP or PPTP. However, allow me to provide a concise explanation. Windows VPN error is a common issue when using a VPN on the Windows platform.
During the client-to-server IKEv2 connection, the data packet may surpass the IP Maximum Transmission Unit. This leads to the fragmentation of the packets. Due to fragmentation, intermediate devices such as routers, NAT devices, and firewalls will occasionally block IP fragments.
The VPN connection will therefore not be formed. Even though it seems hard, the solution to this problem is simple! Updating your Windows 10 devices to the newest version available. Windows 10 1803 introduces IKEv2 fragmentation, which is activated by default.
Kudos! Your VPN should now function without any errors. For more information, you can read our comparison of L2TP Vs PPTP. You can also strengthen your understanding by reading more about Windows VPN errors including Error 628 in New Zealand, Error 619 in New Zealand, Error 720 in New Zealand, and Error 868 in New Zealand.
5. Check PAP Settings
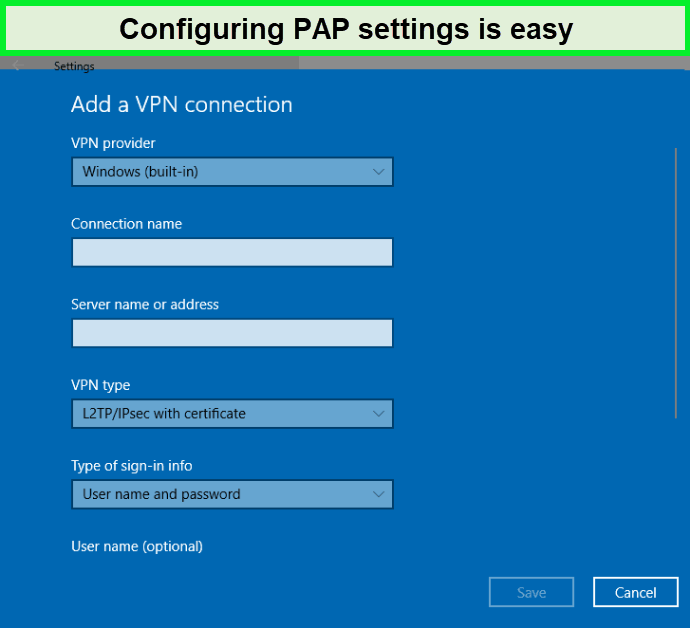
Here is how you can check PAP settings :
- Select Start followed by Settings
- Choose a Network and Internet
- Select VPN on the left navigation window.
- Press Add a VPN connection and utilize the subsequent:
– Windows is a VPN provider operating system (built-in)
– For Connection Name, you may enter anything, as it will be displayed on the screen.
– For the Server name or address, provide the external hostname of the VPN connection.
– Select L2TP/IPsec for the VPN type
– Choose a Username and password for the Type of sign-in info.
– Select Save - Check Modify adapter settings
- Right-click the newly established connection and select Properties
- Select Advanced Settings under the Security tab.
- Click Utilize shared keys
- Input the PSK and then press OK
- Encrypt data with maximum strength
- Select Permit these protocols under Authentication
- Check just the PAP box
- Reboot your computer
FAQs: VPN Error 809 in New Zealand
What is error 809?
VPN error 809 arises when an unsuccessful attempt has been made to create a connection between your local machine and the VPN server, but the remote server is now unreachable. It’s possible that a firewall, NAT router, or other network appliance is blocking your VPN connection between your local machine and the remote server.
How to disable third-party apps for VPN error 809 in New Zealand
Error 809 in a VPN connection can sometimes be caused by third-party apps in New Zealand. The obligation is on you to determine which application, if any, is responsible for this issue. Disabling the offending application is a last resort, however, the issue should go away once it has been eliminated.
It’s unavoidable that every VPN user will eventually run into the terrible VPN Error 809 in New Zealand. The aforementioned solutions will swiftly get you out of this situation.
Conclusion
VPN error 809 in New Zealand is a common error that occurs when attempting to establish a VPN connection on a Windows computer. To fix this error, it is recommended to check the VPN server’s network settings, ensure that the VPN client’s network settings are configured correctly, and ensure that the necessary ports are open on the firewall.
Furthermore, disabling and re-enabling the VPN connection or resetting the network adapter may also resolve the issue. Troubleshooting network settings and firewall configurations can effectively resolve VPN error 809 in New Zealand on Windows.