OSMC, formerly known as Raspbmc is the leading-edge video entertainment center for Raspberry Pi. Based on Kodi/XBMC, the platform offers a sleek interface & a massive media library that takes Raspberrians’ entertainment experience to new heights.
But, the geo-restrictions may spoil your fun when you try to watch mainstream channels. In this guide, we will help you how to bypass geo-restrictions and access leading-edge channels with OSMC VPN in USA.
Installing VPN on OSMC in USA for Raspberry Pi
You can follow these simple steps to configure VPN on OSMC in USAfor Raspberry Pi that include:
- First add a PPTP client by using the following command:
sudo apt-get install pptp-linux
- Now, you need to create a new file in /etc/ppp/peers and give it a name of your choice. Afterwards follow these configurations:
- pty “pptp $VPNHOSTNAME –nolaunchpppd –debug”
- name $USERNAME
- password $PASSWORD
- remotename PPTP
- require-mppe-128
- require-mschap-v2
- refuse-eap
- refuse-pap
- refuse-chap
- refuse-mschap
- noauth
- debug
- persist
- maxfail 0
- defaultroute
- replacedefaultroute
- usepeerdns
- Finally, run this command:
- sudo pon $FILENAME
Now, you can use PPTP VPN on OSMC in USA for Raspberry Pi without any hassle.
Note: We have selected PureVPN as OSMC in USA VPN for PPTP installation. The service offers exceptional privacy features along with a multitude of servers spread around the world
Setup OpenVPN in USA on Raspberry Pi
Setting up OpenVPN on Raspberry Pi is an easy 5 step procedure. However, it is a relatively extensive process as compared to the PPTP VPN setup. To begin installing OpenVPN on Raspberry Pi, you need to follow these steps:
Disclaimer: We have selected PureVPN as a Raspberry Pi OSMC in USA VPN in our setup guide. Currently, PureVPN stands as a leading Raspberry Pi VPN, due to a range of servers, strong encryption protocols, multi-logins, and wallet-friendly plans.
Here’s how Setup OpenVPN on Raspberry Pi:
Step 1: Setup DNS forwarder in USA on Raspberry Pi
First, you need to install a DNS forwarder on your device. A DNS forwarder will protect you against DNS leaks at all times. We will use “dnsmasq“ as a DNS forwarder in the following setup process.
How to install dnsmasq on Raspberry Pi:
-
- Sudo apt-get install -y dnsmasq
- Edit/etc/dnsmasq.conf:
- Sudonano/etc/dnsmasq.conf
Now, uncomment the settings of “domain-needed” and “bogus-priv”, as shown below:
-
- # Never forward plain names (don’t use dot or domain part) domain-needed# Never forward addresses in the non-routed address spaces.bogus-priv
Next, uncomment settings of “interface” and set it to eth0:
-
- # If you want dnsmasq to listen for DHCP and DNS requests only on# specified interfaces (and the loopback) give the name of the# interface (eg eth0) here.# Repeat the line for more than one interface.interface=eht0
Finally, Save the file with applied changes and proceed by restarting dnsmasq service:
-
- sudo service dnsmasq restart
Step 2: Setup OpenVPN in USA on Raspberry Pi
-
- sudo apt-get install -y openvpn
Now, you need to download OpenVPN configuration files from here. Upon download completion, extract the files to pi users’ home folder /home/pi/openvpn
Next, continue by copying the Certificate and WDC.key to /etc/openvpn:
-
- sudocpopenvpn/WDC.keyopenvpn/ca.crt/etc/openvpn
Afterward, create a file /etc/openvpn/auth.txt. This file will be used to store PureVPN login credentials.
-
- sudo nano /etc/openvpn/auth.txt
Store your credentials as shown below:
ExpressVPN0s123456
Password
Now, make this file read/writable only by root:
-
- sudo chmod 600 /etc/openvpn/auth.txt
Create a file /etc/openvpn/server.conf:
-
- Sudo nano /etc/openvpn/server.conf
Next, set file contents as shown below:
-
- client
- dev tun
- remote ukm1-ovpn.purevpn.net 53
- proto udp
- nobind
- persist-key
- pesist-tun
- tls-auth Wdc.key 1
- ca ca.crt
- cipher AES-256-CBC
- comp-lzo
- verb 1
- mute 20
- float
- route-method exe
- route-delay 2
- auth-user-pass auth.txt
- auth-retry interact
- explicit-exit-notify 2
- ifconfig-nowarm
- auth-nocache
Now, you will require to change the ownership of OpenVPN configuration file:
-
- sudo chown www-data:www-data /etc/openvpn/server.conf
Finally, restart best VPN for openvpn service and continue:
-
- sudo service openvpn restart
In case you want to follow connection process in the logs, launch another ssh session and execute following command:
-
- sudo tail -f /var/log/syslog
If an error occurs, it will be displayed in the above log
Step 3: Configure log rotate in USA on Raspberry Pi
Surprisingly, log files occupy excess space on a disk effecting overall system performance. To overcome this issue, we will show you how to configure logrotate, save disk space and enhance your system performance.
Logrotate comes as a pre-installed app in Raspbian build. Here’s how to edit logrotate configuration file:
-
- sudo nano /etc/logrotate.conf
Set the rotate frequency to daily and backlogs to 4, as shown below:
-
- # see “man logrotate” for details# rotate log files dailydaily# keep 4 days worth of backlogsrotate 4
Step 4: Configure IPTables for Raspbian Firewall in USA
A VPN on Raspberry Pi will work next level if IPTables are configured properly. The IPTables are responsible for allowing or blocking a connection as per defined rules. For this, we have allowed forwarding of HTTP and DNS connections.
First download VPN Client Gateway project file with the following command:
-
- wget here
Extract the downloaded files using this command:
-
- unzip master.zip
Execute firewall script and load iptables’ rules. (Find script in folder vpn_client_gateway-master/fw):
-
- sudo ./vpn_client_gw_script.fw
Next, save the rules to make them load automatically at boot time. Use IPtables persistent utility.
Install iptables-persistent:
-
- sudo apt-get install -y iptables-persistent
When the installation is running, you will be asked to store current iptables rules (ipV4 and ipV6). Proceed by acknowledging prompts and iptables’ rules.
Step 5: Disable IPV4 & Enable IP Forwarding in USA
-
- sudo nano /etc/sysctl.conf
Next, uncomment below-mentioned settings:
-
- net.ipv4.ip_forward = 1
Now, add following code:
-
- net.ipv6.conf.all.disable_ipv6=1
Finally, run this command to activate the chances:
-
- sudo sysctl -p /etc/sysctl.conf
Adios! You’ve successfully installed OpenVPN for Raspberry Pi.
How to Install KODI 17 on Raspberry PI through OSMC in USA?
You should follow these following steps to install Kodi 17 on Raspberry PI via OSMC in USA that includes:
- Insert an SD card on your Windows or Mac SD card reader
- Download the OSMC installer through its official site
- Select the operating system for your computer
- Now install and run the OSMC installer
- It’s time to install OSMC on your SD card
- Open the OSMC installer and choose your language
- Select the device type you want to set up
- You will see”where would you like to install OSMC. Choose the SD card
- Take out the SD card after completing the setup process
- Plug the SD card on your Raspberry device
- Once you launch the Pi, OSMC will be installed by default
- Enjoy Kodi on Raspberry Pi straightaway
How to Setup Zomboided VPN Manager for OpenVPN on OSMC in USA?
You can setup Zomboided VPN manager for OpenVPN on OSMC in USA through repository or add-on. You should follow these steps to install Zomboided VPN manager with repository that includes:
- Connect to Raspberry Pi with SSH as OSMC user
- ssh osmc@<IP ADDRESS>
- Download the latest repository
- wget https://github.com/Zomboided/repository.zomboided.plugins/releases/download/1.0.0/repository.zomboided.plugoins-1.0.0.zip
- Through the OSMC homescreen, go to:
- Settings>Add-on browser>Install from Zip
- Choose the repository.zip file to install:
- Home folder>repository.zomboided.plugins-x.x.x.zip
- Once you have installed the repository, go to the repository’s menu:
- Install from repository>Zomboided Add-on repository> Services
- Install the add-on by choosing:
- VPN Manager for OpenVPN
Similarly, you can install Zomboided VPN Manager by the help of add-on. Here is how you should do:
- Connect to Raspberry Pi via SSH as OSMC user
- Download the latest release of the add-on
- wget https://github.com/Zomboided/service. vpn.manager/releases/download/6.0.2/service.vpn.manager-6.0.2.zip
- Through the OSMC homscreen go to
- Settings>Add-on browser>Install from zip
- Select the add-on.zip file to setup:
- Home folder> service.vpn.manager-x.x.x.zip
Why should I use a VPN for OSMC in USA?
A VPN spoofs your location with the country where the desired channel is available. Hence, you can unblock various geo-blocked channels from anywhere. While there are various freemium channels (Genesis, Extreme Sports & Football today) available, many traditional channels require paid subscriptions like ESPN, NBA On-demand, and BBC iPlayer.
Quick Overview – 5 Best VPNs for OSMC in USA in 2023
So the top 5 OSMC VPNs are:
- ExpressVPN – Overall Best VPN for OSMC. It offers 3000+ servers in 105 countries having unmatched unblocking capabilities, security, privacy, and data protection for you. Available for just $6.67/mo - Save up to 49% with exclusive 1-year plans + 3 months free with a 30-day money-back guarantee.
- Surfshark – Best Budget VPN for OSMC. It offers 3200+ servers in 100 countries. The perfect affordable OSMC with easy-configuration and an unlimited simultaneous connections. It is available for just $2.49/mo - Save up to 77% with exclusive 2-year plan + 30-day money-back guarantee and comes with a 30-day money-back guarantee.
- NordVPN – Secure VPN for OSMC. It offers 6000+ servers in 61 countries along with most advanced and secure connection for your Raspberry device. You can get 6 simultaneous connections for just $3.99/mo - Save up to 63% with exclusive 2-year plan + 3 months free for a friend with a 30-day refund program.
- CyberGhost – User-friendly OSMC VPN. It offers 11651+ servers in 100 countries. Available for 7 simultaneous connections, it costs only $2.03/mo - Save up to 84% with exclusive 2-year plans + 4 months free. It also comes with a 45-day money-back policy.
- Private Internet Access – Popular VPN for OSMC. It holds one of the largest server networks in the world with 35000+ servers in 84 countries. Offers best-in-class torrenting experience for Raspberry Pi users, with 10 simultaneous connection for only $2.11/mo , and a 30-day money-back guarantee.
Best VPN for OSMC in USA in 2023 [In-Depth Analysis]
Selecting a VPN that allows you to watch various geo-limited services like BBC iPlayer HBO Now and others on OSMC is a tricky job. For your ease, I have shortlisted some VPNs that offer servers in different countries of the world. This way, you can watch your favourite channels from anywhere.
Here is an in-depth analysis of the 5 best VPNs for OSMC in USA in 2023:
1. ExpressVPN – Best VPN for OSMC in USA
Key Features:
- 3000+ servers in 105 countries
- 5 simultaneous connections
- AES-256-bit military-grade encryption
- Internet kill switch, split-tunnelling, and server obfuscation
- 30-day money-back guarantee
- Compatible with: Windows, Mac, Android, iOS, Linux, Router, PS4, Xbox, Chromebook, Roku, Smart TVs, Firestick, and Android TV box
- Unblocks: Netflix, BBC iPlayer, Hulu, Channel4, Hotstar, ITV, Sony Liv, Amazon Prime Video, and more
ExpressVPN is the best VPN for OSMC. It is compatible with Raspberry Pis using ARMv7 CPUs and running Raspberry Pi OS versions that Debian’s Long Term Support Window supports.
Currently, the service provides 3000+ servers in 105 countries globally. It also works with all major streaming platforms such as Netflix, BBC iPlayer, Hulu, Channel4, Hotstar, ITV, Sony Liv, Amazon Prime Video, and more.
ExpressVPN hails from a user-friendly jurisdiction i.e. British Virgin Islands (BVI). Apart from the safe jurisdiction, ExpressVPN also offers AES-256-bit encryption, TrustedServer network, internet kill switch, and DNS/IPv6 leak protection, to ensure that your online activities are completely hidden from everyone.
ExpressVPN works on Raspberry Pi 2, 3, Zero WH, 4B, and 400. You can also connect 5 devices simultaneously on a single account. It also supports other devices such as Windows, Mac, Android, iOS, Linux, router, PS4, Xbox, Firestick, and Android TV box.
You can get ExpressVPN at the cost of $6.67/mo - Save up to 49% with exclusive 1-year plans + 3 months free with a 30-day money-back guarantee. There is also 24/7 live chat support in case you need assistance.
You can learn more about this VPN in our ExpressVPN review.
2. Surfshark – Best Budget VPN for OSMC in USA

Key Features:
- 3200+ servers in 100 countries
- Unlimited simultaneous connections
- AES-256-bit military-grade encryption
- Internet kill switch, clean web, and multi-hop
- 30-day money-back guarantee
- Compatible with: Windows, Mac, Android, iOS, Linux, PS4, Xbox, Chromebook, and Android TV box
- Unblocks: Netflix, BBC iPlayer, Hulu, Channel4, Hotstar, BT-Sports, NBC Live, Spotify, ESPN+, and more
Surfshark is the best budget VPN for OSMC offering 3200+ servers in 100 countries. It works with Netflix, BBC iPlayer, Hulu, Channel4, Hotstar, NBC Live, Spotify, ESPN+, and more.
Furthermore, Surfshark has the ability to support unlimited simultaneous connections on a single account. Apart from Raspberry Pi, you can also use it on Android, iOS, Windows, Mac, Roku, PS4, Xbox, Linux, router, and many other devices.
You can get its cheapest subscription at the cost of $2.49/mo - Save up to 77% with exclusive 2-year plan + 30-day money-back guarantee and it comes with a 30-day money-back guarantee as well. To know about this service in detail, explore our Surfshark review.
3. NordVPN – Secure VPN for OSMC in USA
Key Features:
- 6000+ servers in 61 countries
- 6 simultaneous connections
- AES-256-Bit military-grade encryption
- Double VPN, onion over VPN, and obfuscated servers
- 30-day money-back policy
- Compatible with: Windows, Mac, Android, iOS, Linux, Chromebook, Firestick, and Android TV box
- Unblocks: Netflix, BBC iPlayer, Hulu, Channel4, YuppTV US, Sling TV, Vudu, and more
NordVPN is a Panama-based VPN service that provides 6000+ servers in 61 countries. You can use the service to enjoy fast and smooth online streaming while travelling from anywhere.
NordVPN can unblock various streaming services such as Netflix, BBC iPlayer, Hulu, Channel4, HBO Max, Sling TV, Vudu, and more. You can connect up to 6 devices simultaneously on a single account. It can also be configured on Windows, iOS, Android, Mac, Linux, router, Roku, Chromebook, Xbox, PS4, and more.
NordVPN offers the best security features including AES-256-bit encryption, internet kill switch, secure DNS, double VPN, onion over VPN, and obfuscated servers to guarantee ultimate online security and privacy.
The obfuscated servers disguise your VPN traffic as normal internet traffic to help you bypass VPN blocks and geo-restrictions. The Double VPN feature encrypts your traffic twice passing it over 2 servers for maximum data protection.
NordVPN only costs $3.99/mo - Save up to 63% with exclusive 2-year plan + 3 months free for a friend, and it also comes with a 30-day money-back guarantee.
To learn more about this provider, check out our NordVPN review.
4. CyberGhost – User-friendly OSMC VPN in USA
Key Features:
- 11651+servers in 100 countries
- 7 simultaneous connections
- AES-256-Bit military-grade encryption
- WiFi protection, streaming dedicated IPs
- 45-day money-back guarantee
- Compatible with: Mac, Windows, Android, iOS, Linux, Roku, Chromebook, Fire TV, Smart TV, Android TV box, and more
- Unblocks: Disney+, Hulu, ITV, Channel4, Netflix, Voot, Foxtel, Nine, CBS, EuroSports UK, and more
CyberGhost is the most user-friendly VPN for OSMC. CyberGhost has optimized servers for various purposes such as streaming, torrenting, and online gaming. It holds an impressive network of 11651+servers in 100 countries.
You can connect up to 7 devices on a single CyberGhost subscription. It also comes with user-friendly apps for Mac, Windows, Android, and iOS devices. It is capable of unblocking popular streaming sites such as Disney+, Hulu, ITV, HBO, Netflix, Voot, Foxtel, Nine, and more.
With this VPN you don’t have to worry about your online security and privacy as CyberGhost comes with a complete zero-log policy, AES-256-Bit encryption, and DNS/IPv6 leak protection.
It is available for only $2.03/mo - Save up to 84% with exclusive 2-year plans + 4 months free and comes with an impressive 45-day money-back guarantee.
5. Private Internet Access – Popular VPN for OSMC in USA
Key Features:
- 35000+ servers in 84 countries
- 10 simultaneous connections
- AES-256-bit military-grade encryption
- Ad and malware blocking, SOCKS5 proxy, WireGuard protocol
- 30-day money-back guarantee
- Compatible with: Mac, Windows, Android, iOS, Linux, Roku, Chromebook, and more
- Unblocks: Netflix, BBC iPlayer, Hulu, BFI Player, Crave TV, ORF, Nine, CBS, and more
PIA is one of the most popular VPNs for OSMC owing to its massive server network consisting of 35000+ servers in 84 countries. With this many servers, Raspberry Pi users will never face any problem accessing geo-restricted content.
PIA VPN works with popular streaming services, including Netflix, BBC iPlayer, Hulu, BFI Player, Crave TV, Peacock TV, HBO Max, and more.
It allows 10 multi-logins and it can be easily set up on iOS, Android, Mac, Windows, Roku, Firestick, ChromeBook, router, Linux, PS4, and more.
As for security, PIA offers AES-256-bit encryption, ads, malware, and tracker blocker, multiple VPNs gateway, and zero-log VPN to ensure that your actual identity, location, and internet traffic is secure.
PIA VPN costs only $2.11/mo and comes with an extensive 30-day money-back guarantee.
To learn more about this provider, check out our PIA VPN review.
How to Add Channels on OSMC in USA & Enjoy Limitless Entertainment
OSMC or Open Source Media Center doesn’t come with a pre-stored channel library. Having that said, viewers need to add various channels by following a simple process. Here’s how you can add channels on OSMC in USA:
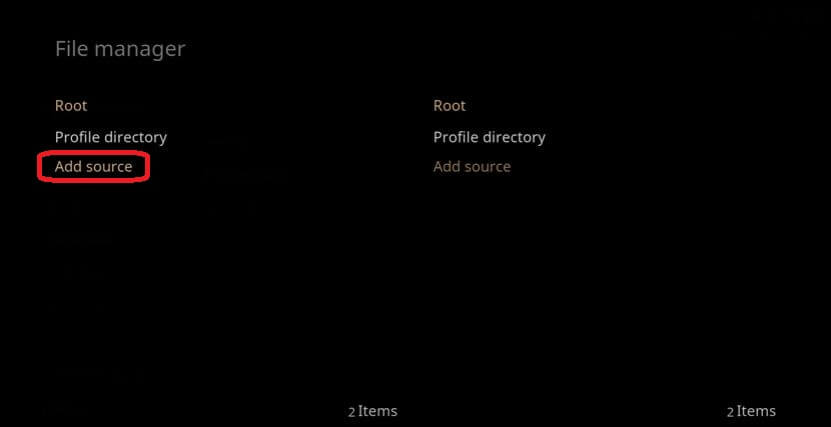
- From the home screen of OSMC in USA, click on Settings>File Manager
- Click on Add Source
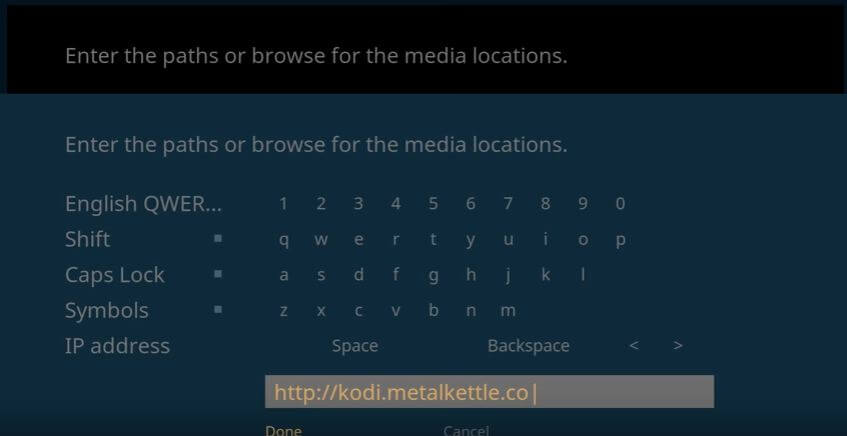
- You will be asked to enter the path or browse to media location, enter https://kodi.metalkettle.co in the box
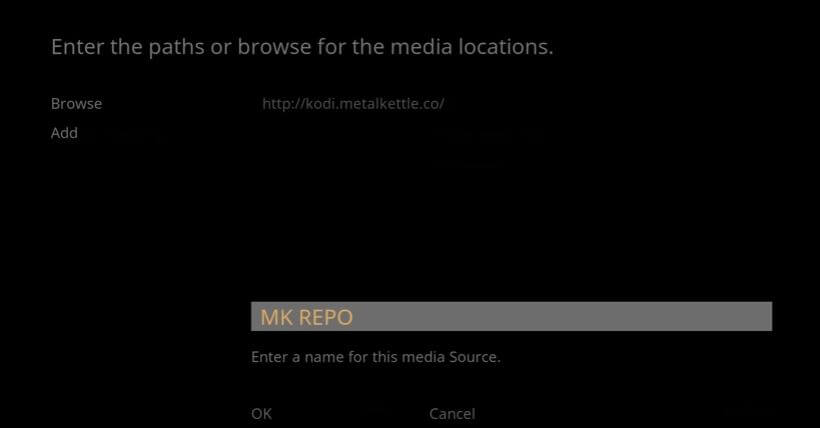
- Next, enter any name for the specified media source as shown below
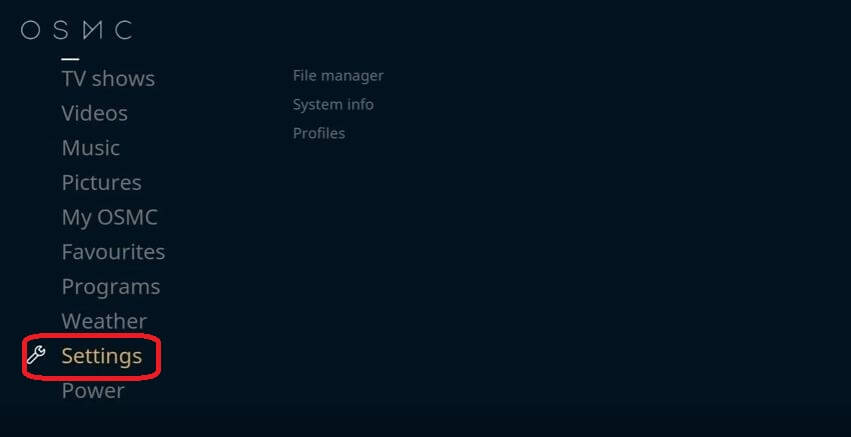
- Now go back to home screen, click on Settings
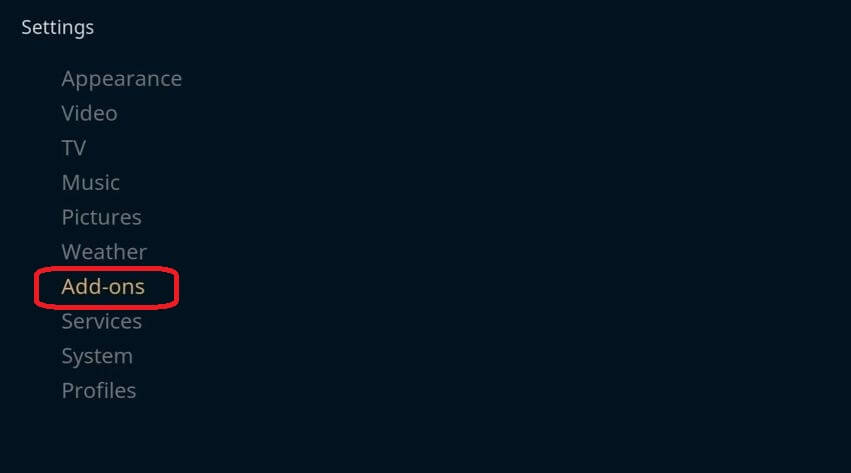
- Go to Add-ons
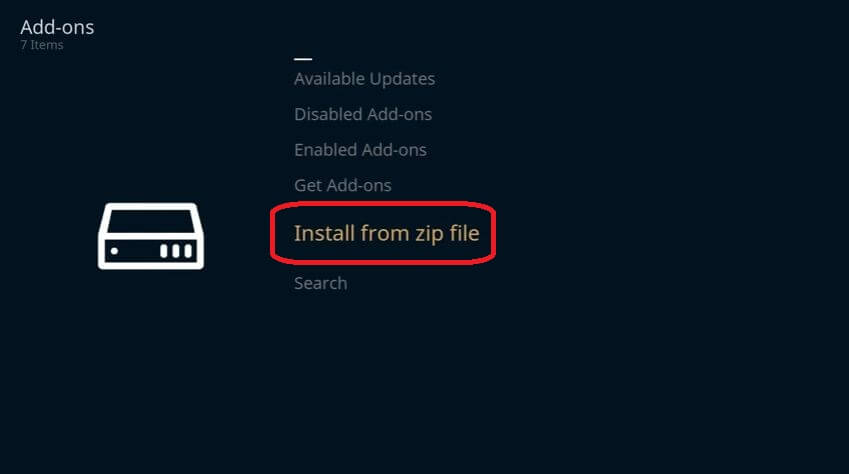
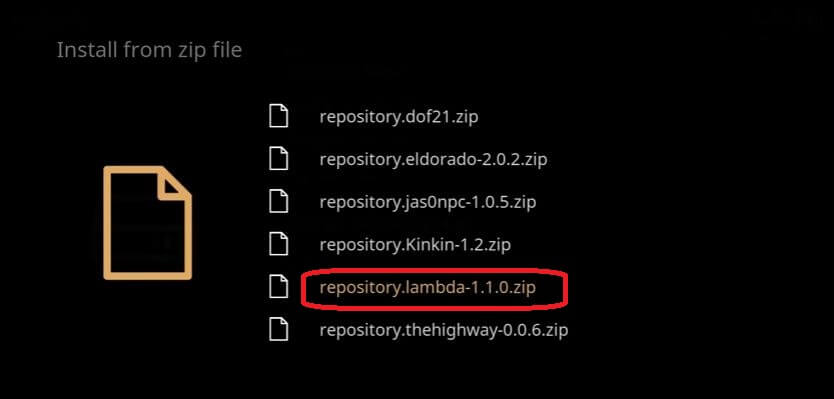
- Choose Install from zip file
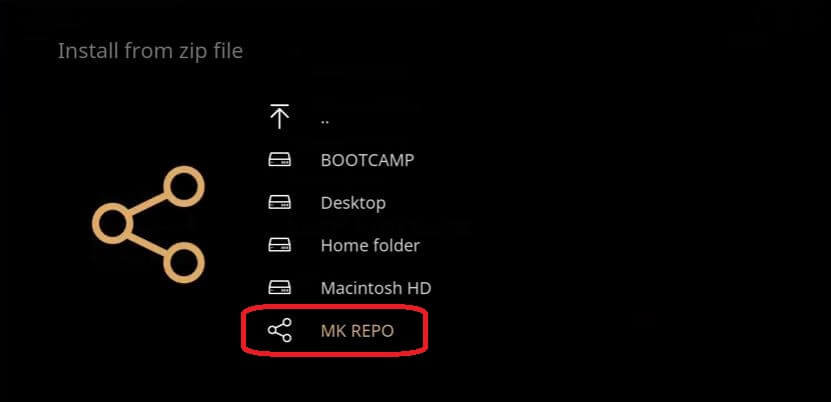
- From the list of zip files, select MK REPO
- Now select Recommended Repositories

- Choose lambada-1.1.0.zip to install
- After installing zip file, you will be notified with an Add-on enabled notification as shown below
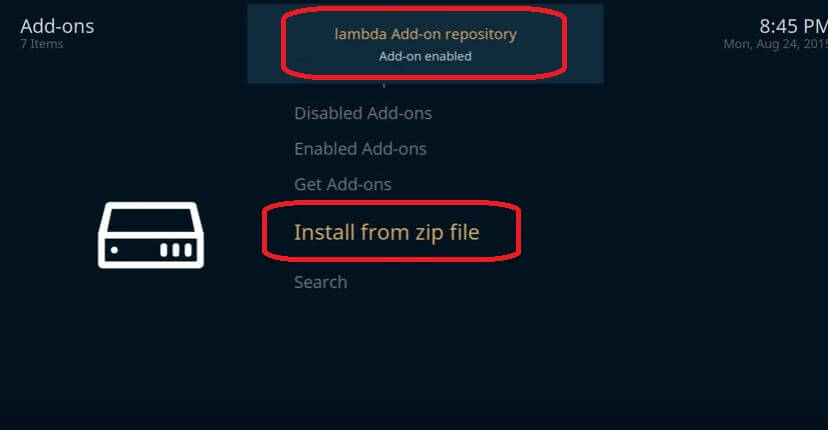
- Now, click on Get Add-ons
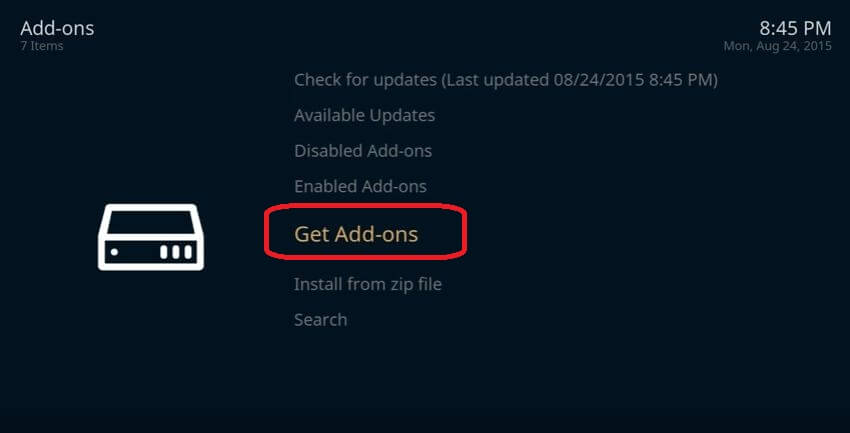
- Next, select lambda Add-on repository
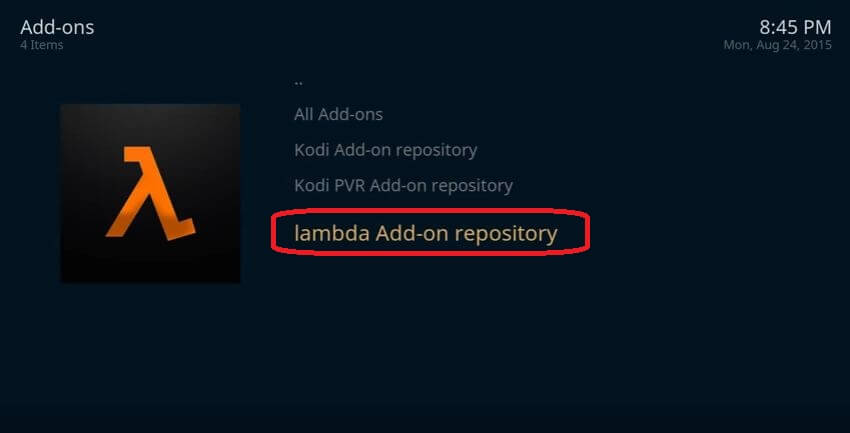
- Click on Video Add-ons
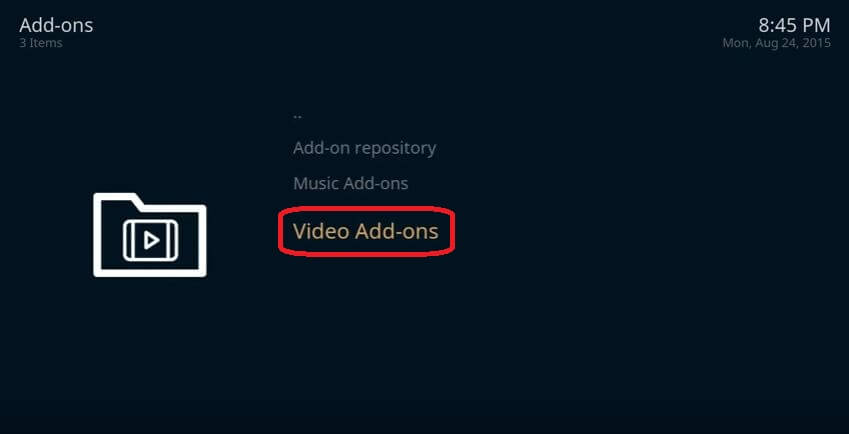
- From the list of Video Add-ons, install Genesis

- Now, go back to home screen and click on Videos>Video Add-ons
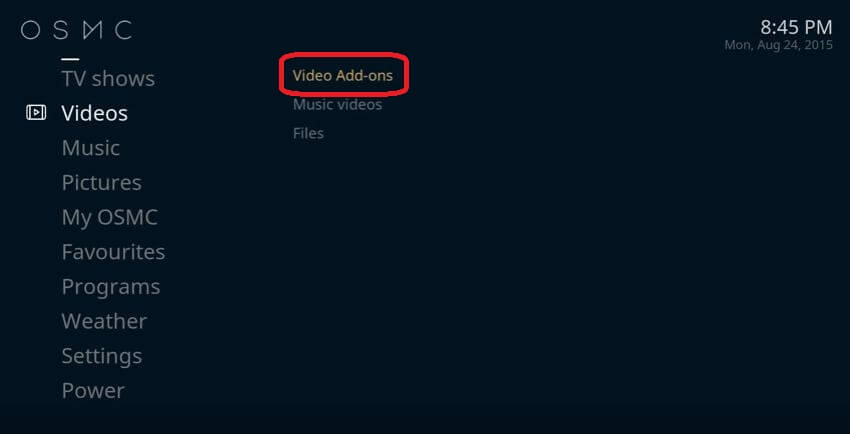
- You will find Genesis over there, proceed by clicking on it

In addition, you can setup endless channels on OSMC by following above procedure. Just make sure you’re connected to one of the OSMC VPN to evade the imposed geo-restrictions. Also, with a VPN on OSMC, you achieve top-notch data protection while accessing media from a remote device through OSMC.
FAQs – Best VPN for OSMC in USA
What is the difference between OSMC and Kodi?
OSMC (Open Source Media Center) is a Linux distribution based on Debian that runs Kodi on number of devices. On the other hand, Kodi is a free and open source media center application.
How do I set up OSMC in USA?
You can setup OSMC in USA after following these simple steps:
- Download the OSMC app installer from the download section available on its official site
- Launch the installer, choose language and select your Raspberry Pi model
- Select the OSMC version, select the SD Card for the installation target
- Choose between wired or wireless network connection
- Choose the target device, agree to end user license agreement and continue the installation process
- Confirm the installation on chosen device
- After completing the installation process, disconnect SD card from your device and insert it on your Raspberry Pi
- Connect all the cables, turn on and go through the system setup process
- Once you complete the setup procedure, choose My OSMC and enter Pi Config
- Choose Hardware support and select your HiFiBerry in the SounCard overlay parameter
- Restart your Raspberry Pi and choose settings
- Select system, choose Audio output device parameter to ALSA: Default (snd_rpi_hifiberry_dac Analog) or something similar that depends on your HiFiBerry
- Enjoy watching your favorite shows and movies after adding content to your library
How do I make a Zomboided repository?
You can create a Zomboided repository after following these steps:
- Download the Zomboided Repository
- Through USB, you should transfer the repository to your device
- Open your Kodi app and click on settings
- Go to system settings> expert mode>addons
- Turn on ‘Unknown Sources’ when the warning box pops up by clicking ‘Yes’
- Go back to Kodi homescreen again, click settings>addons>package installer
- Go to the folder where you have placed the Zomboided repo on your device and choose I
- Wait to get add-on enabled notification, select install from repository
- Select Zomboided add-on repository>services>VPN Manager for OpenVPN>Install
- Select your VPN service>enter your VPN’s account username and password
- The VPN Manager addon will try to establish a connection to your VPN service
- If all goes well, you will be given a list of VPN server locations your VPN service delivers
- Choose your desired VPN service to access geo-blocked Kodi add-on
- You will see a popup message that includes your new IP address and the VPN server your are connected to
Do Kodi add-ons work with OSMC in USA?
Yes Kodi add-ons that support other platforms also work with OSMC in USA.
How do I install IPVanish on LibreELEC?
You can follow these below-mentioned steps to install IPVanish on LibreELEC:
- Download and save the Zomboided repository
- After copying the repository zip file on to your USB stick, insert it to your OpenELEC device and go to Programs>Addons>select ‘Get More’ option
- Through Add-ons>Program>add-ons, choose ‘..’ from the top of the list
- From the add-ons>all repositories list, choose “..” from the first option of the menu again
- You will see the option ‘Install from Zip File’, choose ‘install from Zip File’
- Find USB or network drive, locate repository zip you downloaded and choose it
- Once the Zomboided add-on repository is installed, you may download the VPN manager by choosing ‘Install from repository’ on the add-on page
- Choose Zomboided add-on repository, VPN Manager for OpenVPN and select install install in the add-on information page
- The repository will update automatically and may take few minutes to complete
- It’s time to set up the VPN Manager for OpenVPN
- Go back to Kodi’s home screen>Programs>Open VPN Manager for OpenVPN
- Choose add-ons settings> from setup wizard, select IPVanish from the VPN provider drop down menu and provide your username and password in the required boxes
- Choose the ‘VPN connections’ option in the ‘VPN connections’ window, choose ‘First VPN connection’ to see it starts connecting
- Once the add-on is connected, you will be able to see the list of servers, choose your preferred server
- After connecting, you should verify by checking ‘Display VPN Status’ page in the VPN Manager’ add-on to confirm your IP address has been changed successfully
- You can include more VPN servers by using the VPN connections tab
Wrapping Up
OSMC is the mainstream entertainment platform available on Raspberry Pi. But, with the imposed geo-restrictions on leading broadcasting channels on OSMC in USA, netizens are left with no other option except to watch what is available in their region. However, by using a VPN on OSMC in USA, you can freely access endless channels with zero restrictions or limitations.