To install NordVPN on MikroTik in Australia, you need to create an IKEv2 EAP VPN tunnel from a MikroTik router on a NordVPN server.
MikroTik unquestionably is the best hardware one can have. Combined with a service as reliable as NordVPN, well, you have the best combo ever.
Setting up a VPN on a MikroTik router is difficult in Australia. It tends to feel more challenging when you’re doing it for the first time. But one thing’s for sure, you can enjoy the securest connection for torrenting and streaming once you use NordVPN on MikroTik.
This article will give you a step-by-step guide to setting up NordVPN on MikroTik in Australia. And, if you’re wondering why you should use NordVPN in Australia, you can check out our detailed NordVPN review to learn more about its traits.
How to set up NordVPN on MikroTik in Australia
You can set up NordVPN on MikroTik by establishing an IKEv2 EAP VPN tunnel on a NordVPN server on MikroTik routers with RouterOS version 6.45 or above.
1. Open the terminal on your MikroTik RouterOS settings.
2. Run the following commands to install the NordVPN root CA certificate into the hardware:
/tool fetch
url=https://downloads.nordcdn.com/
certificates/root.der
/certificate import file-name=root.der
3. Open this NordVPN link to determine the hostname of the recommended server.
4. Set up the IPsec tunnel. NordVPN recommends that in order to avoid interference with current or future IPsec configurations, you should set up a Phase 1 profile and Phase 2 proposal configurations by entering these commands:
/IP IPSec profile
add name=NordVPN
/IP IPsec proposal
add name=NordVPN pfs-group=none
NordVPN further recommends that you should create a new policy group and template instead of using the default policy template to generate policy in Australia. This way, you would be able to differentiate this configuration from any other IPsec configuration.
5. Enter these commands to create a new policy group:
/IP IPSec policy group
add name=NordVPN
/IP IPsec policy
add dst-address=O.O.O.O/O
group=NordVPN proposal=NordVPN src-
address=O.O.O.O/O template=yes
6. You need to establish a new mode configuration entry with responder=no once you’ve created the IPsec tunnel. This action will request configuration parameters from the server:
/IP IPsec mode-config.
add name=NordVPN responder=no
7. Once you’re done, you need to create your peer and identity configurations. Please insert the following commands, including your NordVPN credentials:
/ip ipsec peer
add address=recommended server exchange-
mode=ike2 name=NordVPN
profile=NordVPN
ip ipec identity
add auth-method=EAP certificate=”” eap-
methods=eap-mschapv2 generate-
policy=port-strict mode-config=NordVPN
peer=NordVPN policy-template-
group=NordVPN
username=Your NordVPN username
password=Your NordVPN password
If you’re unable to recall your NordVPN credentials, find them through your NordVPN dashboard.
8. After this, select what you need to send to the VPN tunnel. You must be having a local network with an address connected to your router. To send all your traffic to the VPN tunnel for complete security, you will be required to establish an Address/Firewall/IP list consisting of your local network.
/ip firewall address-list
Add address=11.3.9.1/27 list=local
Afterward, link your newly created Address/Firewall/IP list to mode config configuration:
/IP IPsec mode-config
Set [ find name=NordVPN ] src-address-
list=local
9. The last step is to verify correct source NAT rule is generated when the tunnel is created using this command:
/IP firewall Nat print
To set up NordVPN on other routers, check out this guide: NordVPN router set up guide in Australia.
Benefits of Using NordVPN in Australia

- 5100+ servers in 60+ countries
- Military-grade encryption (Double VPN encryption)
- CyberSec protects your device from intrusive ads
- Strict no-logs policy
- Automatic Kill Switch
- DNS leak protection
- 6 Multi-logins
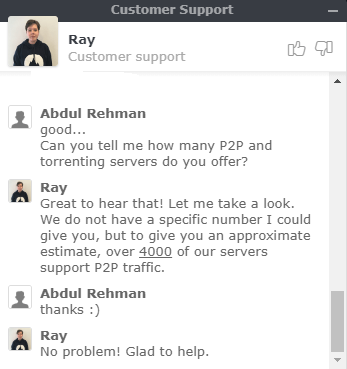
- Live chat support
- Easy-to-use app
While NordVPN promises to offer the best security and privacy in Australia, it also offers various other features that one can enjoy with its subscription:
1. Speedy connection
NordVPN is one of the fastest VPNs that one can use over the internet. To prove this, we conducted a speed test while being connected to NordVPN to find out how fast NordVPN really is.
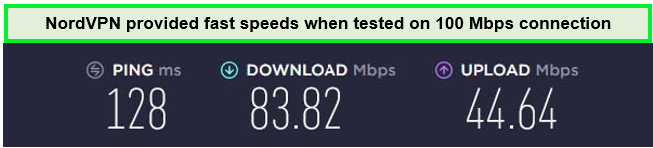
This VPN offers an average downloading speed of 83.82 Mbps on a 100 Mbps connection. It eliminates ISP throttling, providing users with a smooth and speedy experience. NordVPN works best with torrenting too, allowing you to bypass every P2P restriction and download torrents from any part of the world with complete anonymity. One can never go wrong when using NordVPN.
2. Compatible with multiple devices
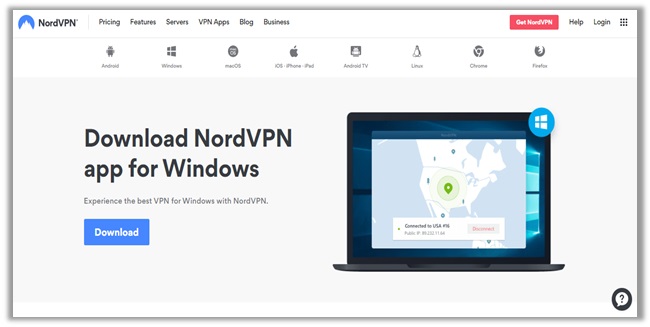
NordVPN is compatible with iOS and Android, Windows, Mac, and many other devices.
To set up NordVPN on other devices, check out these guides:
- How to install NordVPN on Chromecast?
- How to install NordVPN on Fire Stick?
- How to install NordVPN on Roku?
- How to install NordVPN on Kodi?
- How to install NordVPN on PS4?
- How to install NordVPN on Xbox?
- How to install NordVPN on Raspberry Pi?
- How to install NordVPN on Synology?
- How to install NordVPN on Nvidia Shield?
- How to install NordVPN on pfSense?
3. Thousands of servers
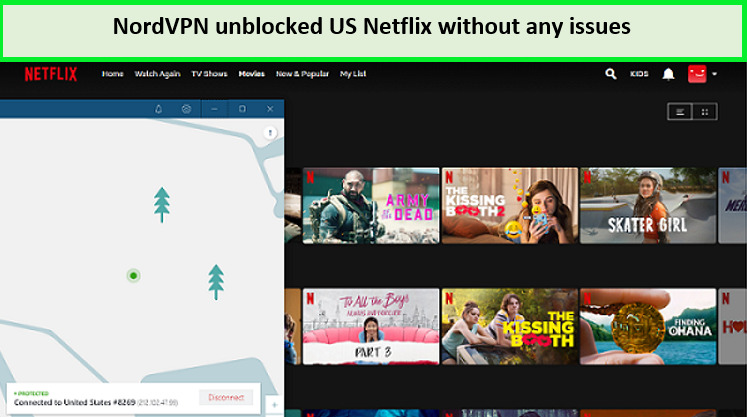
NordVPN offers 5,500+ servers across the world. This enables users to access all geo-restricted services easily in Australia. You can stream Netflix with NordVPN, and other streaming services easily using NordVPN servers.
Why is my NordVPN app not working in Australia? Quick tips to solve your issue:
If NordVPN is not working properly on your MikroTik router in Australia, follow the steps below:
1. Check your internet connection
For this, you need to check whether you have a stable internet connection. Try refreshing your internet and connecting it again.
2. Check your server location
If your internet isn’t the issue, then there is a possibility that the server you’re connected to may be providing a slow service. As mentioned before, NordVPN offers 5500+ servers all over the world. You can switch to a different server if that’s the case, without any problem.
3. Verify your NordVPN credentials
Entering the wrong credentials is one standard error that everyone makes. You should always recheck the credentials you have entered, as this may be the root cause of the problem you’re facing. If the above methods didn’t work, feel free to check out our NordVPN not working in Australia guide.
Conclusion
When you connect and use NordVPN on MikroTik in Australia, all your devices at your home or office will automatically get protected. You can get the best privacy, security, and unblocking experience by choosing NordVPN for your MikroTik router.
NordVPN is not only super reliable but also quite affordable. Although NordVPN doesn’t offer a lifetime plan, its 2-year plan is quite affordable and only costs AU$ 6.16/mo (US$ 3.99/mo) - Save up to 63% with exclusive 2-year plan + 3 months free for a friend. NordVPN also offers a free trial and a 30-day money-back guarantee to its users. If you end up not being satisfied with their service in Australia, you can always cancel your NordVPN subscription anytime.